Comprehensive Guide to Setting Up a Vue Project Using Git
This guide will walk you through the process of setting up a Vue project using Git. By following these steps, you can quickly and confidently start your project.
1. Initial Setup
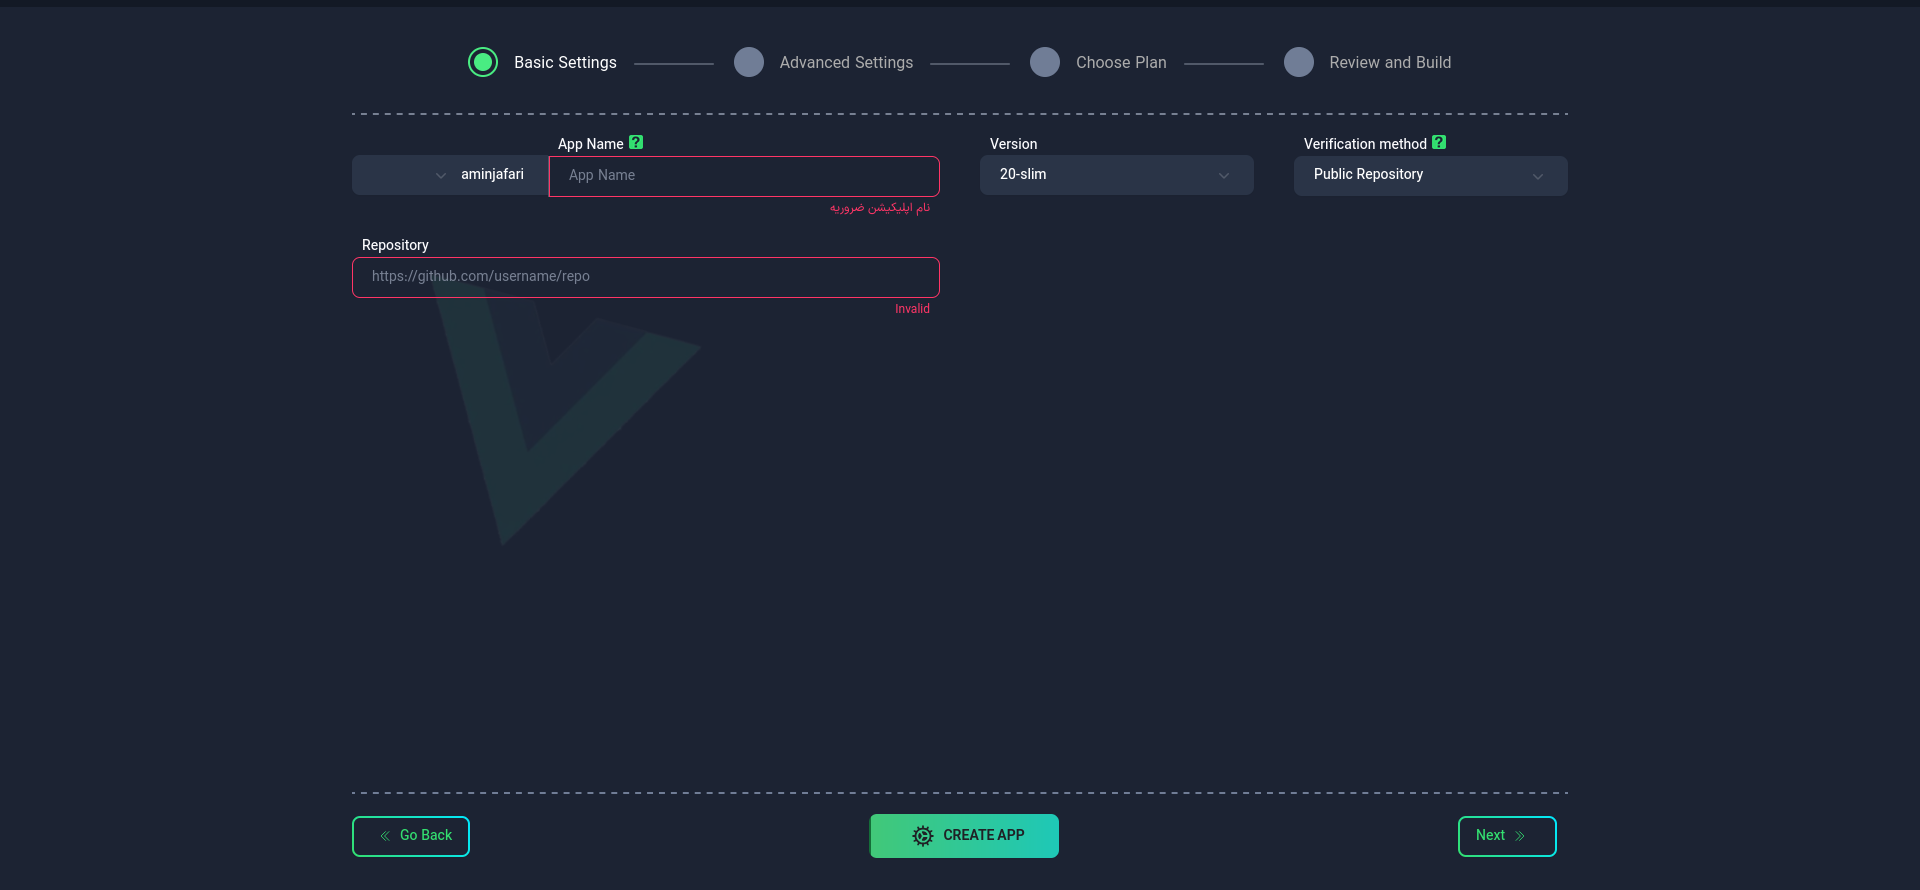
Application Name
First, choose a suitable name for your application. This name will be used as an identifier in your project domain.
- Use lowercase letters and only use - as a separator between words.
- You cannot change the application name after creating the app.
Node Version
Choosing the appropriate Node version for your project is very important. Select from the available list or enter your desired version. Please note that the selected version must be available in Docker repositories (such as DockerHub).
Repository
Repository Address
Enter the Git repository address for your project. Example: https://github.com/username/repo
Make sure that the package.json file is present in your project.
Repository Type and Access
- Public: Enter the address directly.
- Private: You can connect your private repo to the platform in two ways:
Connect with Access Token
Connect with SSH Key
After completing this step, select the "Next" option.
2. Advanced Settings (Optional)

In this section, you can apply more detailed settings for your project:
Build
Sample package.json file:
{
  "name": "my-vue-project",
  "version": "0.1.0",
  "private": true,
  "scripts": {
    "serve": "vue-cli-service serve",
    "build": "vue-cli-service build",
    "lint": "vue-cli-service lint"
  },
  "dependencies": {
    "core-js": "^3.8.3",
    "vue": "^3.2.13"
  },
  "devDependencies": {
    "@vue/cli-plugin-babel": "~5.0.0",
    "@vue/cli-plugin-eslint": "~5.0.0",
    "@vue/cli-service": "~5.0.0",
    "eslint": "^7.32.0",
    "eslint-plugin-vue": "^8.0.3"
  },
  "eslintConfig": {
    "root": true,
    "env": {
      "node": true
    },
    "extends": ["plugin:vue/vue3-essential", "eslint:recommended"],
    "parserOptions": {
      "parser": "@babel/eslint-parser"
    },
    "rules": {}
  },
  "browserslist": ["> 1%", "last 2 versions", "not dead", "not ie 11"]
}
Build Command
- Specific command(s) for building the project
- Default:
npm run build - To use multiple commands, use ; as a separator (e.g.,
npm run build;npm run start)
Run Command
- Command to run the project
- For Vue.js, it is better to leave this field empty
Output Dir
- Location of the built files
- Default:
dist/
Port
Specify the port number on which your application will run. The default port is 3000, but you can change it.
-
After the initial setup, it is possible to change the port.
-
To specify the port, make sure to use the address
0.0.0.0.
Resource Scheduling
Disk
Environment Variables
4. Select Plan
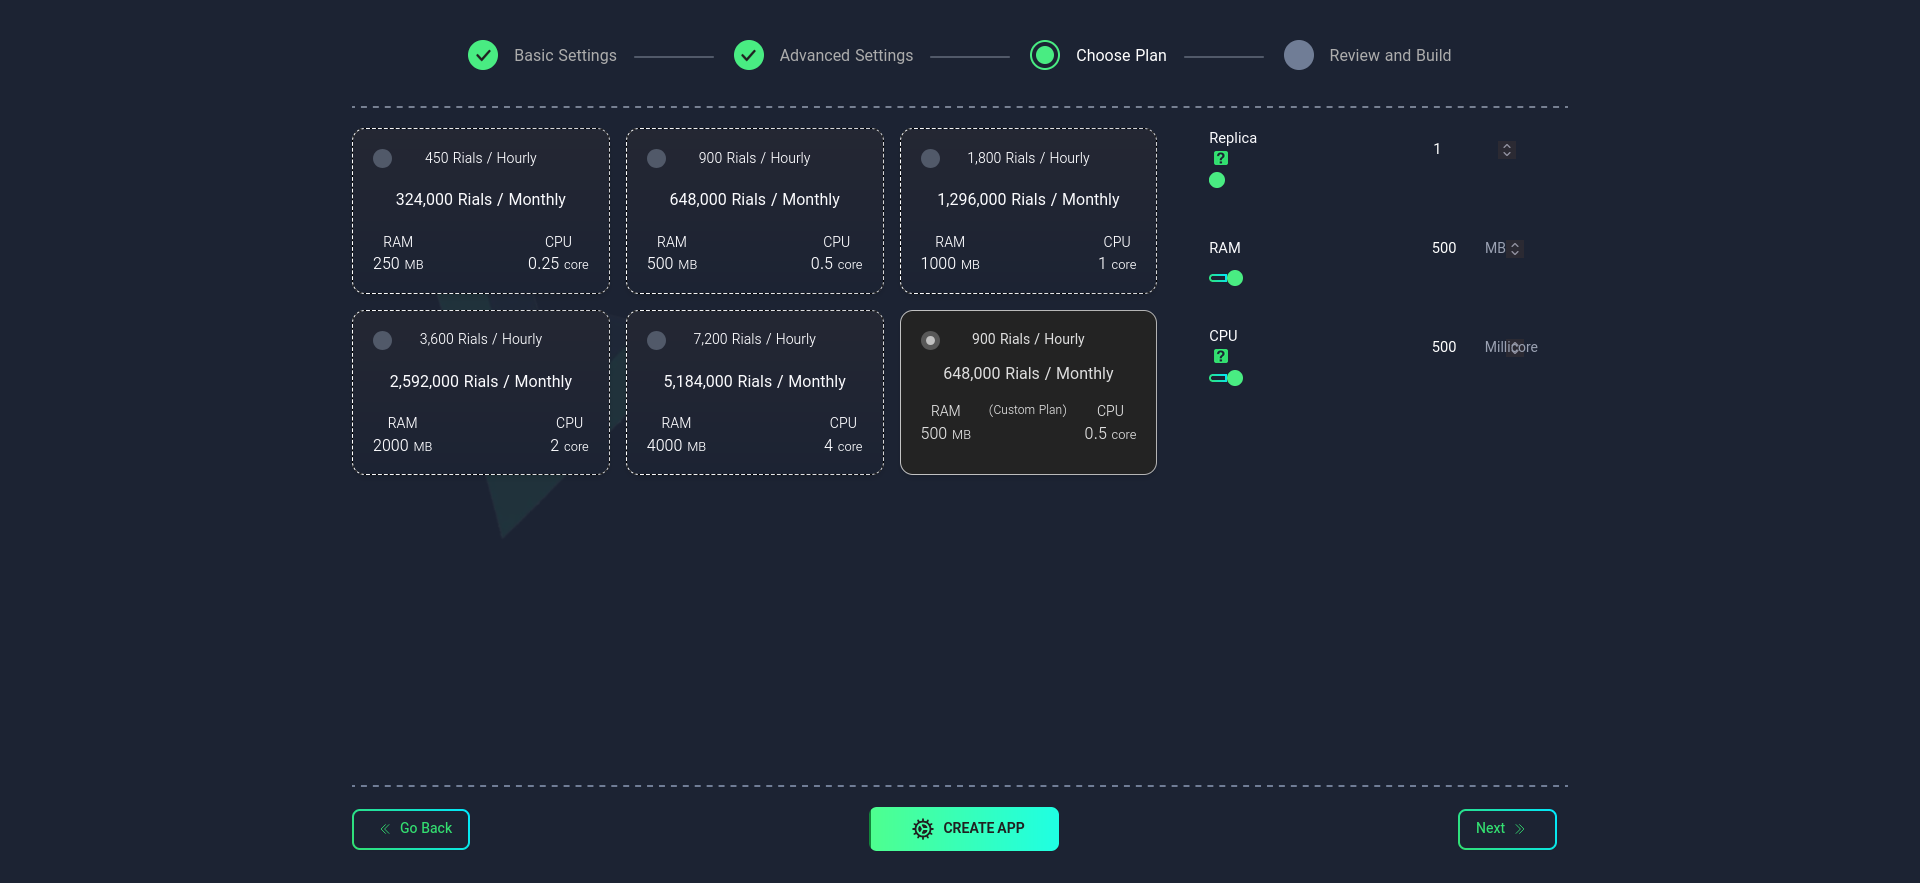
In this step, choose your desired plan. You can select from the available list or configure it manually.
Replicas
Specify the number of replicas (running instances) for your application. This number affects the performance and availability of your application.
Importance of the Number of Replicas
- Scalability: Increased processing power with more replicas
- High Availability: Maintaining performance in case one instance fails
- Load Distribution: Distributing the load among multiple instances
After selecting your desired plan, choose the Create App option.
5. Project Management
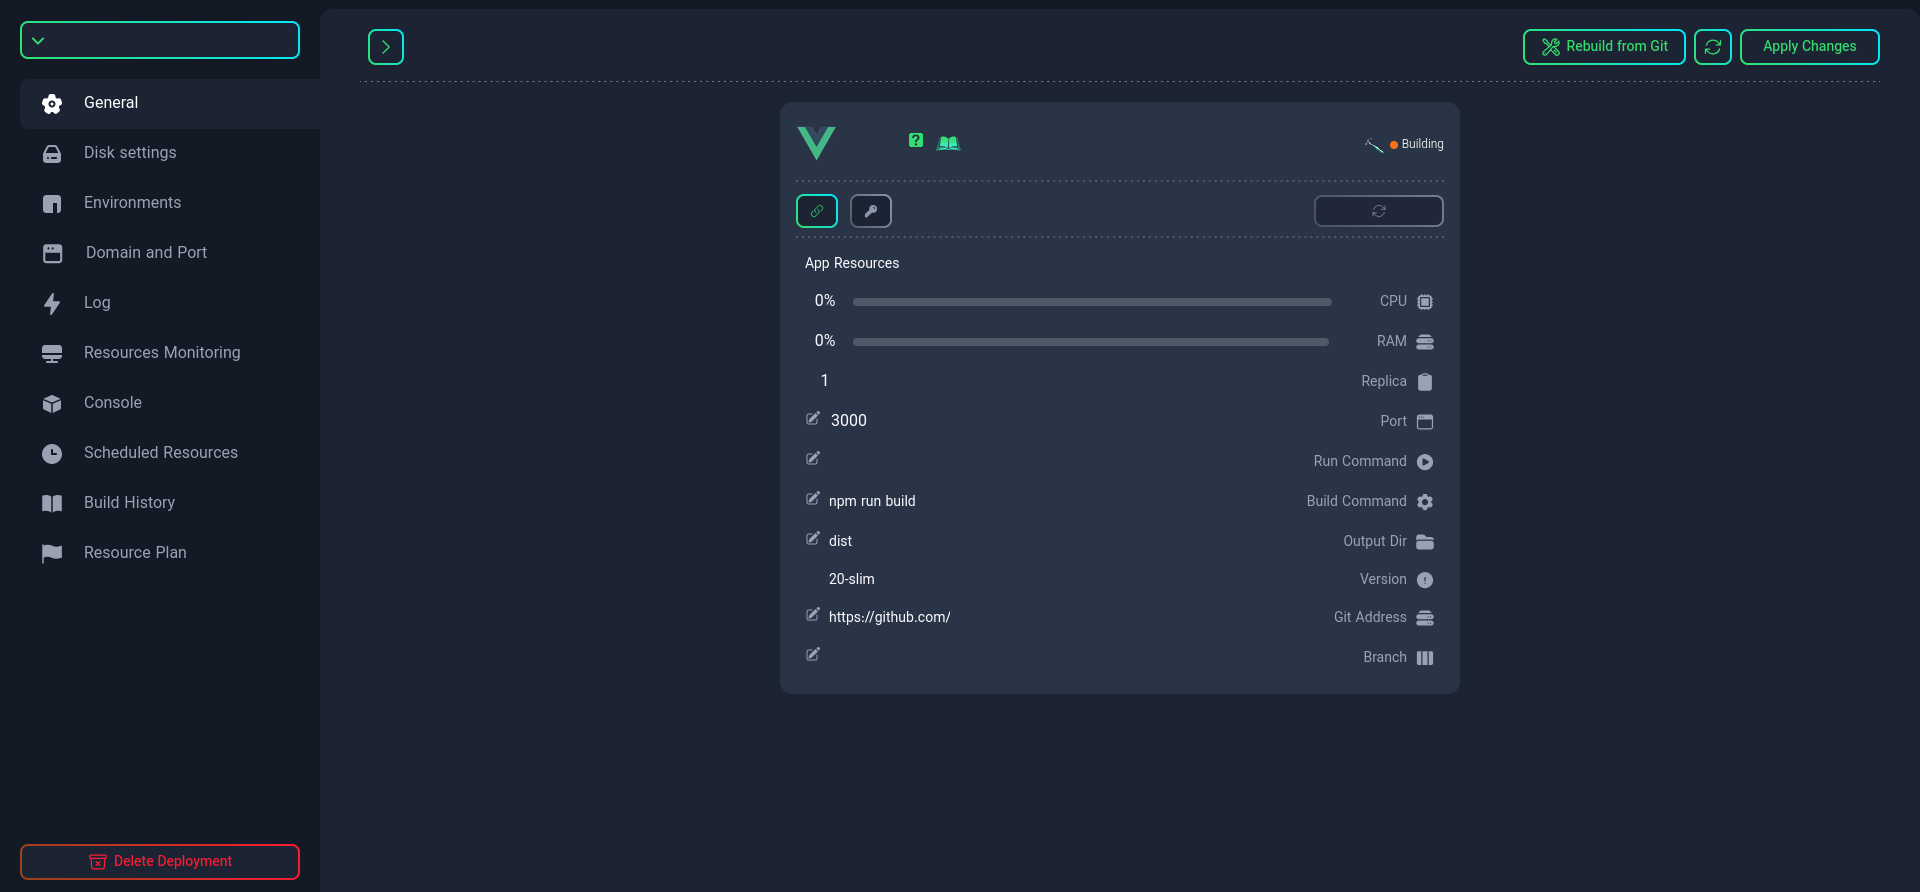
After setup, you will have various management options available:
-
Check project status
-
Manage connections and resources
-
Manage port
infoThe port you defined in your project must also be defined here.
-
Rename Dockerfile (if needed)
tipIf your project requires very specific settings, you can create your own custom Dockerfile. For more information, refer to this link.
-
Change build command

-
Change run command

-
Specify output folder location

-
Manage Git repository and rebuild operations
-
Project branch selection
-
Restart the project
If you want to use multiple commands for building the project, use ; as a separator (e.g., npm run build;npm run start)
With these features, you can efficiently and professionally manage your Vue project.